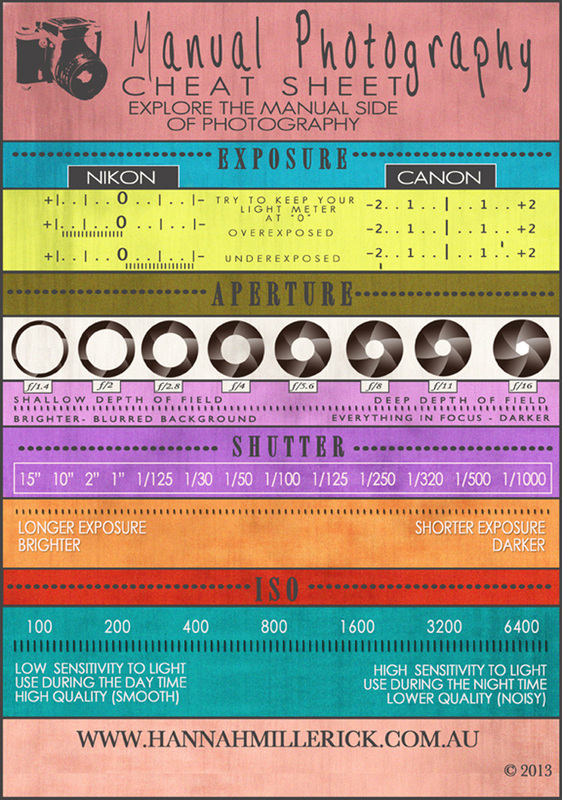
Aperture, Shutter speed & ISO
Many people describe the relationship between ISO, Aperture and Shutter Speed using different metaphors to help us get our heads around it. This is one example -The Window Imagine your camera is like a window with shutters that open and close.
Aperture is the size of the window. If it’s bigger more light gets through and the room is brighter.
Shutter Speed is the amount of time that the shutters of the window are open. The longer you leave them open the more that comes in.
ISO is how sensitive your eyes are the amount of light coming through the window
:
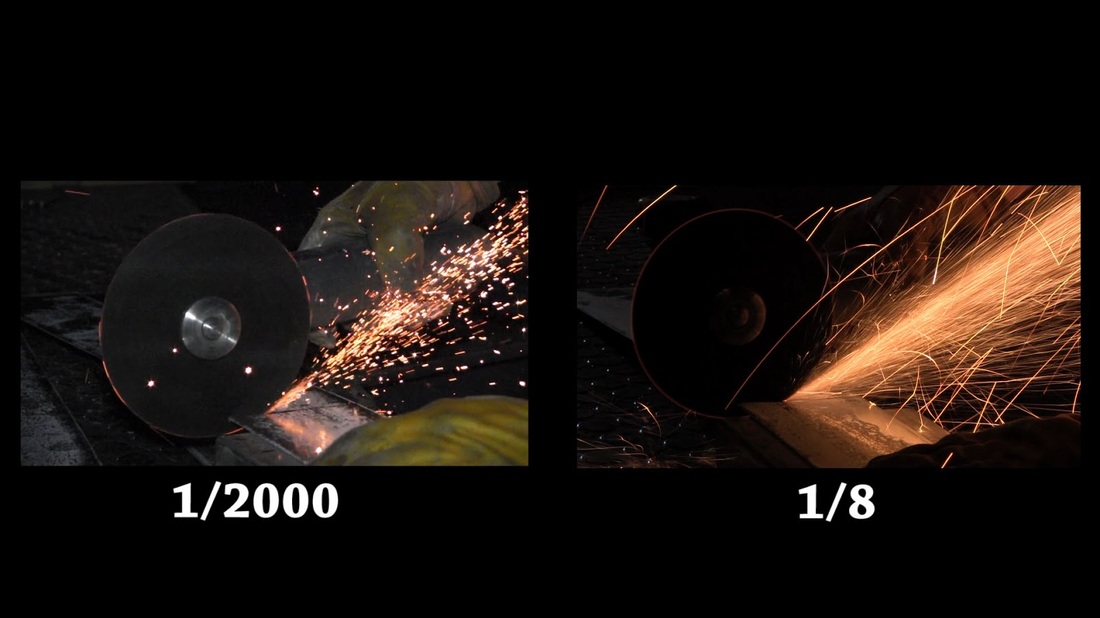
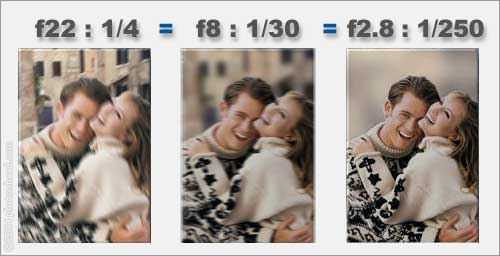
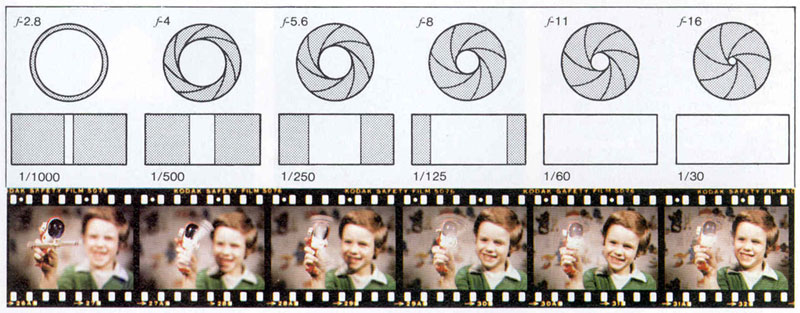
Examples of different shutter speeds

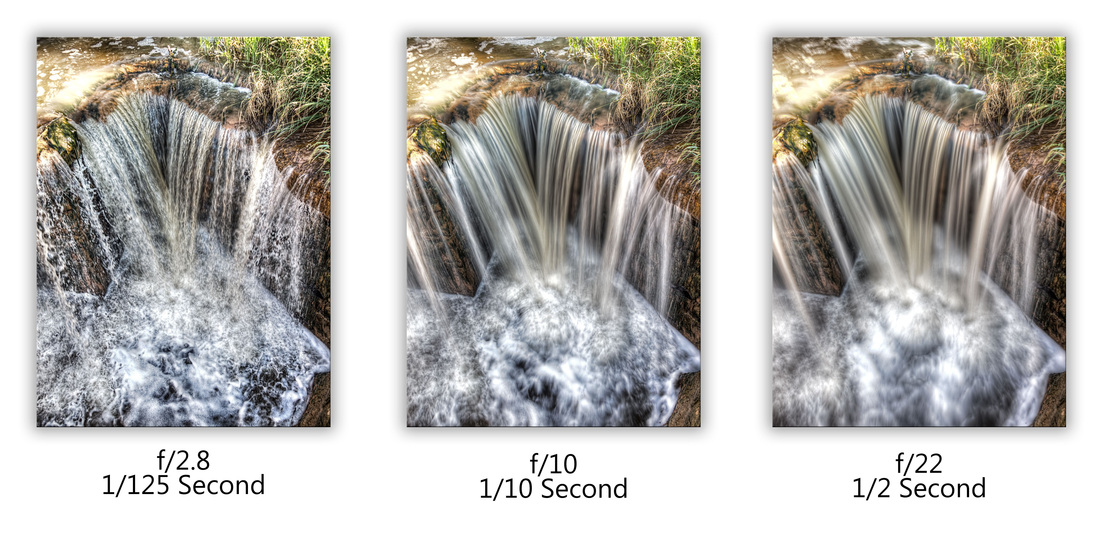
Examples of different aperture settings
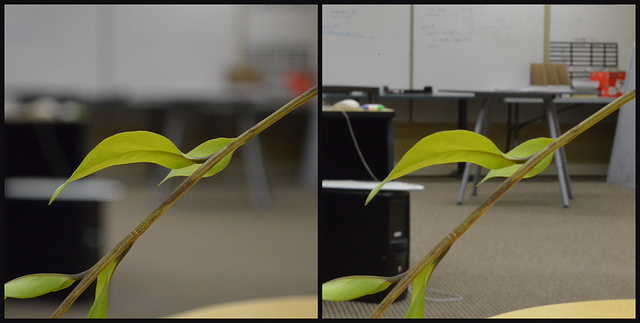
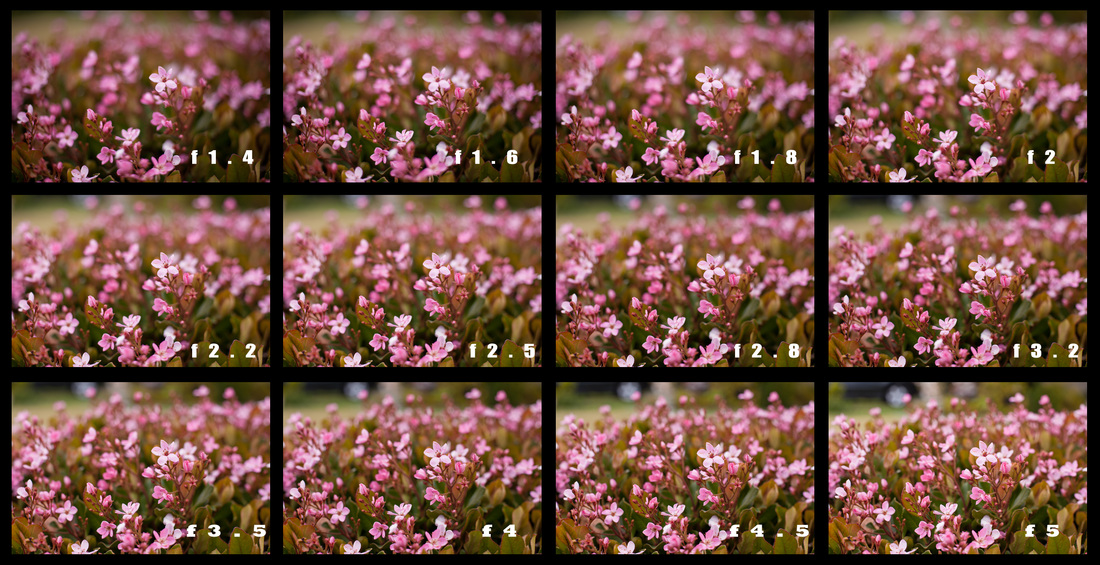
Depth of field
ADvanced camera modes
On most DSLR cameras, there will also be the letter modes – M (Manual), AV (Aperture-Priority), TV or S (Shutter-Priority) and P (Programmed Auto). Manual allows the photographer to change every single setting; Aperture-Priority allows the photographer to set the aperture value and the camera automatically sets the correct shutter speed; TV lets the photographer choose the shutter speed first (for example when shooting sports) and the camera automatically sets the correct aperture. P-Program mode is similar to Auto mode - the shutter and aperture settings are determined by the camera, but the photographer can adjust the shooting and image-recording functions
Basic camera modes
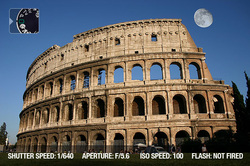
AUTO MODE
Automatic Exposure is when the camera chooses the optimum shutter speed, aperture, ISO and flash settings for your shot. All you need to do is point and shoot. This can be good if you have no idea of what settings to choose and also when you need to shoot quickly. The shot here is perfectly exposed as the day is well lit, though auto-exposure may struggle in situations where the light is uneven, and it tends to trigger the flash even when it’s not necessary.
Automatic Exposure is when the camera chooses the optimum shutter speed, aperture, ISO and flash settings for your shot. All you need to do is point and shoot. This can be good if you have no idea of what settings to choose and also when you need to shoot quickly. The shot here is perfectly exposed as the day is well lit, though auto-exposure may struggle in situations where the light is uneven, and it tends to trigger the flash even when it’s not necessary.
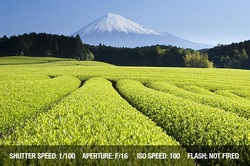
LANDSCAPE MODE
Landscape mode usually uses a small aperture (high f/number) to create a well focused image from the foreground into the distance (on old style cameras, the setting was ‘infinity’ represented by a sideways figure 8). Landscape mode tends to suit a wide lens, and again works well if the scene is well lit. It will use flash if it reads the foreground as too dark, but you can manually turn this off.
Landscape mode usually uses a small aperture (high f/number) to create a well focused image from the foreground into the distance (on old style cameras, the setting was ‘infinity’ represented by a sideways figure 8). Landscape mode tends to suit a wide lens, and again works well if the scene is well lit. It will use flash if it reads the foreground as too dark, but you can manually turn this off.
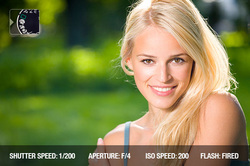
PORTRAIT MODE
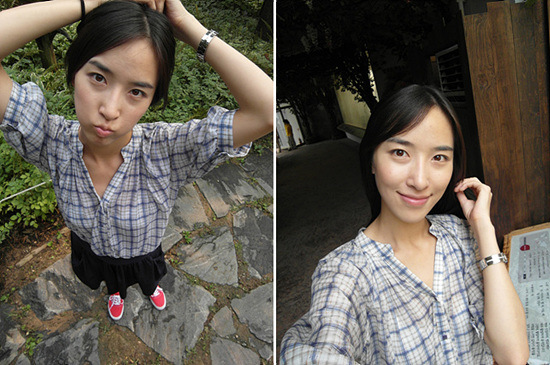
Portrait mode will “think” that there is a subject in the foreground of the frame and choose a shallow depth of field in order to keep the human subject in focus but the background blurred. If the camera reads the scene as dark, it will add fill-in flash. Fill-in flash is useful in sunny conditions too, when the sun casts a harsh shadow. Portrait mode generally works best in well lit conditions.
Portrait mode will “think” that there is a subject in the foreground of the frame and choose a shallow depth of field in order to keep the human subject in focus but the background blurred. If the camera reads the scene as dark, it will add fill-in flash. Fill-in flash is useful in sunny conditions too, when the sun casts a harsh shadow. Portrait mode generally works best in well lit conditions.
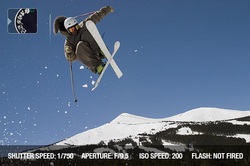
SPORTS MODE
Because sports are fast paced activities, sports mode will give you a high shutter speed of at least 1/500 – 1/1000 of a second. With a high shutter speed to freeze movement, it means that flash is usually not necessary – though once again this works best on a bright day. Sports mode can work well alongside continuous shooting mode, where images are taken consecutively – the result is a number of shots capturing action in mid air.
Because sports are fast paced activities, sports mode will give you a high shutter speed of at least 1/500 – 1/1000 of a second. With a high shutter speed to freeze movement, it means that flash is usually not necessary – though once again this works best on a bright day. Sports mode can work well alongside continuous shooting mode, where images are taken consecutively – the result is a number of shots capturing action in mid air.
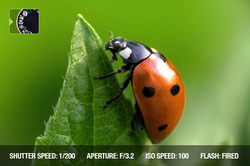
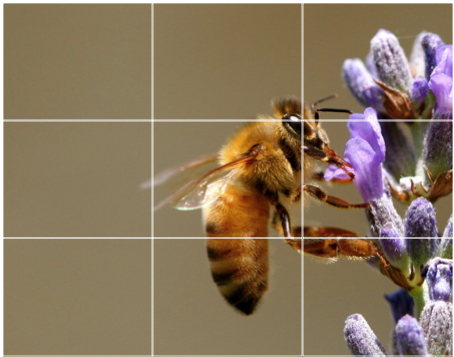
MACRO MODE (Close ups)
Macro mode is very useful to take a photograph of an image smaller than your hand. Remember that macro mode will not give you super close up images; for this you will need a macro lens. Macro mode will work best in bright conditions and will choose a shallow depth of field to focus on the subject. Therefore, if light is low, use a tripod. Your focusing also has to be more careful when taking a macro image. This is because when you use a shallow depth of field, you give yourself a smaller margin for error
Macro mode is very useful to take a photograph of an image smaller than your hand. Remember that macro mode will not give you super close up images; for this you will need a macro lens. Macro mode will work best in bright conditions and will choose a shallow depth of field to focus on the subject. Therefore, if light is low, use a tripod. Your focusing also has to be more careful when taking a macro image. This is because when you use a shallow depth of field, you give yourself a smaller margin for error
camera angles
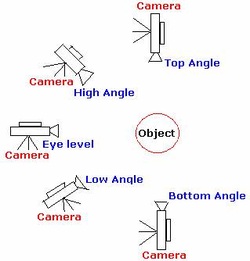
Basic Camera Angles for Photography
Camera shots

Basic Camera Shots
photography task
Using your iPad, phone camera, DSLR or Point & Shoot camera, take photos of people or objects using each camera angle and camera shot listed.
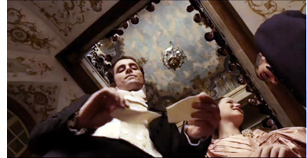
High Angle
Low Angle
Eye Level
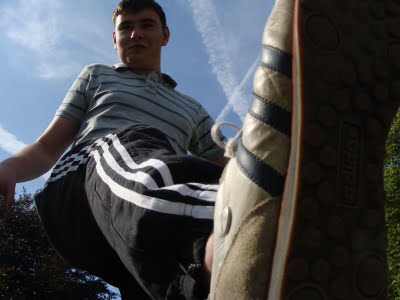
Worms Eye View
Close Up
Extreme Close Up
Wide Shot
Medium Shot
Present these eight (8) photo's on a blog, a powerpoint presentation or any other media that you choose and explain why this shot or angle might be used by photographers or film makers
Due Date: Wednesday 30th April
High Angle
Low Angle
Eye Level
Worms Eye View
Close Up
Extreme Close Up
Wide Shot
Medium Shot
Present these eight (8) photo's on a blog, a powerpoint presentation or any other media that you choose and explain why this shot or angle might be used by photographers or film makers
Due Date: Wednesday 30th April


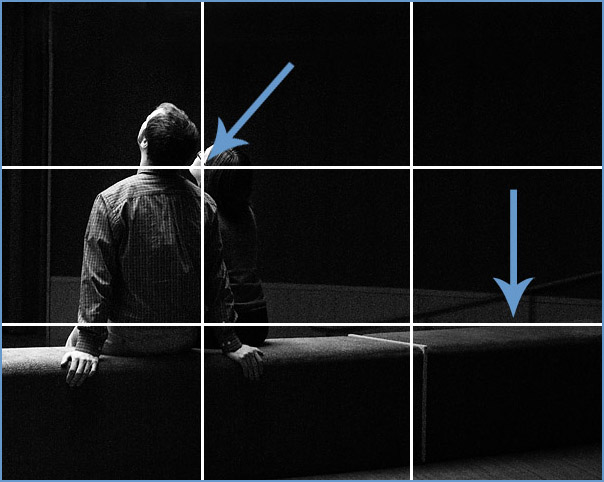
Composition - the rule of thirds
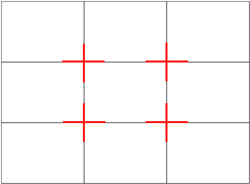
This is the rule of thirds grid. Download it to help you compose your photos.
what is the rule of thirds?
examples of the rule of thirds
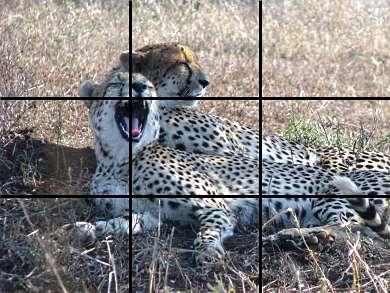
Rule of Thirds Example: Landscapes
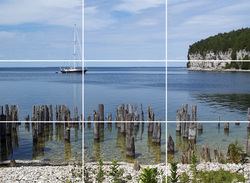
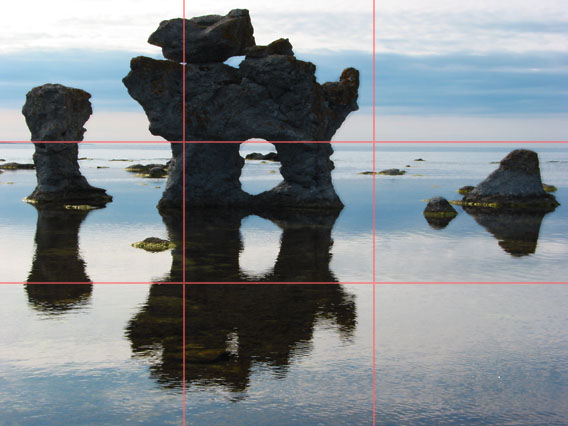
When taking a picture of a landscape, it’s natural to want to center the horizon in the frame. However, pictures often look better if the horizon falls on the upper or lower horizontal dividing line. If the focus of your image is on land (i.e. mountains, buildings), the horizon should fall near the upper third and if the focus is the sky (i.e. sunsets, sunrises), the horizon should fall near the lower third.
Here is an example of the rule of thirds for a landscape photo. The focus is on the land area rather than the sky so the bottom two-thirds of the photograph are filled with land and the top third is sky.
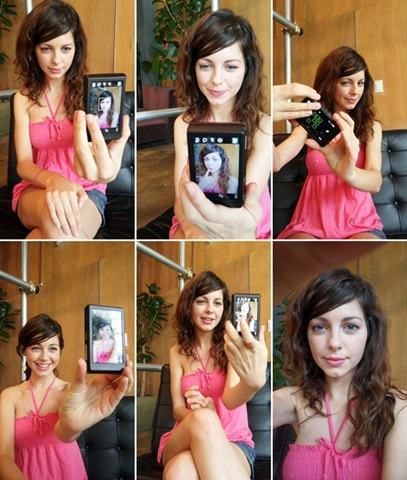
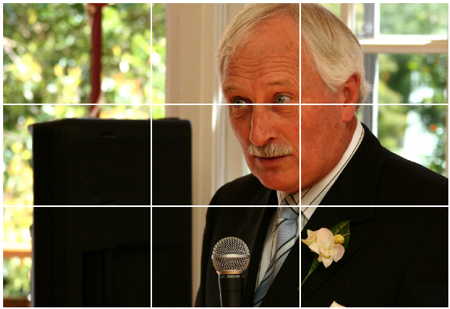
Rule of Thirds Example: Portraits
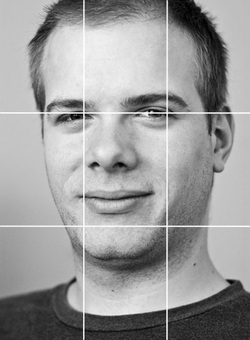
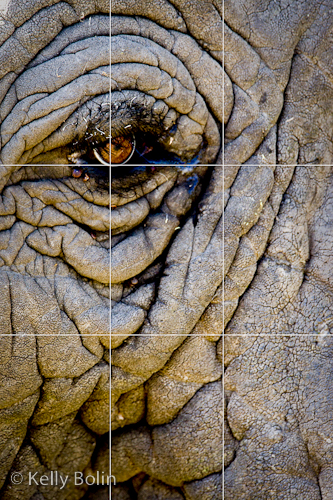
Here is an example of a rule of thirds portrait. As you can see, the eyes are lined up with the upper horizontal line and each eye is where the upper horizontal line intersects with a vertical line.
Here is an example of a rule of thirds portrait. As you can see, the eyes are lined up with the upper horizontal line and each eye is where the upper horizontal line intersects with a vertical line.
why do you like these photos? Or why don't you?


you can use the rule of thirds for movies also - watch this youtube video
setting the rule of thirds grid on your iphone & Ipad
For iPhone
Enabling grid lines in the default Camera app can help make sure your photo is not only straight, but that you're using the rule of thirds in order to capture the most interesting photo you can. In iOS 7, the way you turn grid lines on and off in the Camera app has changed slightly. If you're fumbling around trying to figure out how to turn them on, follow along and we'll help.
For the iPad
1. Open the Camera app
2. Click Options
3. Slide the Grid switch to On.
Enabling grid lines in the default Camera app can help make sure your photo is not only straight, but that you're using the rule of thirds in order to capture the most interesting photo you can. In iOS 7, the way you turn grid lines on and off in the Camera app has changed slightly. If you're fumbling around trying to figure out how to turn them on, follow along and we'll help.
- Launch the Settings app from the Home screen of your iPhone or iPad.
- Scroll down and tap on Photos & Camera.
- Again scroll down towards the bottom of the page and under the Camerasection, there is an option for Grid. Turn the feature On by tapping on the slider.
For the iPad
1. Open the Camera app
2. Click Options
3. Slide the Grid switch to On.
